Removing the member server from the Citrix farm

From XenApp 5.0, we could run the chfarm command to remove and add a server to a farm. This command is no longer a valid method from XenApp 6.x.
From Delivery Services Console if we remove the server from the farm, it only removes the server from farm so that it is not visible in the console. However, the server is not completely removed from the data store. So the most effective method of removing a server from a farm is to use the XenApp Server role manager. Select “Leave the current server farm” from the Citrix XenApp Server Configuration window.

Posted in Citrix XenApp | Leave a comment

Citrix Streaming Profiler for Streaming Application

Install Citrix Streaming Profiler (D:\Citrix Streaming Profiler) from the Citrix software DVD/ISO.

2014-07-02 15_13_42-GAVSCTX01 - VMware Workstation


After installation, Citrix Streaming Profiler window will open to create a new Profile, or open Streaming Profiler from Start > Program Files and click New Profile.

2014-07-02 15_33_14-GAVSCTX01 - VMware Workstation 2014-07-02 15_34_24-GAVSCTX01 - VMware Workstation 2014-07-02 15_39_35-GAVSCTX01 - VMware Workstation 2014-07-02 15_40_01-GAVSCTX01 - VMware Workstation


Give the name for the Profile.

2014-07-02 15_40_40-GAVSCTX01 - VMware Workstation


Then select the Target Operating System in which the application should run and the language.

2014-07-02 15_41_22-GAVSCTX01 - VMware Workstation

Choose an Installation program, it can be any Executable file, Batch file or MSI file.

2014-07-02 15_42_59-GAVSCTX01 - VMware Workstation

Now run the Installer by clicking Launch Installer button. The installation will start and complete the installation. In the background, the Profiler will capture the path and the files which are needed for the program to launch from the operating system and creates the Profile.

2014-07-02 15_43_49-GAVSCTX01 - VMware Workstation

Once the installation completed, some applications must be run once to complete the process. Select the application and click Run. After launching close the application and click next.

2014-07-02 15_44_58-GAVSCTX01 - VMware Workstation 2014-07-02 15_45_23-GAVSCTX01 - VMware Workstation

We can select the application that we need to publish in Citrix, we can also modify if any command to be executed with the application or delete the applications from the list.

2014-07-02 15_46_04-GAVSCTX01 - VMware Workstation

Save the Profile in the network shared path, i.e., UNC path. Below picture shown is from the different server.

2014-07-02 15_48_33-GAVSADC01 - VMware Workstation

Now launch XenApp AppCenter to publish the application. Choose the application type as Streamed if possible and Streamed to server. Now the profile application will stream to the server and the clients will launch it through ICA.

2014-07-02 15_49_57-GAVSCTX01 - VMware Workstation 2014-07-02 15_52_39-Citrix XenApp - Applications

Posted in Citrix XenApp | Tagged , , , , | Leave a comment

How to resolve “Cannot connect to the vCenter server due to a certificate error”

When creating Host and Resources connection in Citrix Studio, we get the error “Cannot connect to the vCenter server due to a certificate error”. The error message indicates that the XenDesktop is not able to connect to vCenter, because it does not trust the server certificate in use. Integrating XenDesktop with vSphere or vCenter needs SSL certificate for security purpose. But in lab and testing environment, we can follow the below process to make XenDesktop 7.1 Studio working with an HTTP connection to vCenter 5.1.

1. Download and install Putty.

2. Connect to vCenter and login.

3. Type in cd /etc/vmware-vpx through Putty to change the directory.

4. Type in vi proxy.xml to edit the xml file.

5. We need to change ALL instances of httpsWithRedirect to httpAndHttps.

6. Press Esc and then type in :wq to save changes in the xml file and quit.

7. Restart vCenter server.

8. Connect vCenter appliance using Internet Explorer.

9. Go to System tab, check the information and the time zone.

10. Now in Citrix Studio go to Hosting node and configure Connection and resources.

Also a simple solution to this challenge is to connect to vCenter using IE, accept the security warning, click on the certificate warning and install the server certificate on the XenDesktop Broker.

But it will not work in all scenario. Below is another way of work around.

1. Connect to vCenter server and browse to “C:\ProgramData\VMware\VMware VirtualCenter\SSL“

2. Copy the cacert.pem file to a temp directory in XenDesktop Broker, “C:\Temp”)

3. Open a MMC as an administrator, add the Certificates Snap-In and select to manage certificates for the local Computer Account.

4. Browse to "Trusted Root Certification Authorities“ and select Import.

5. Import the cacert.pem file. (You need to select "All Files“ from the dropdown menu in the lower right hand corner, to be able to see it)

6. Now you should be able to see the vCenter certificate in the list of trusted certificates and XenDesktop should connect to vCenter without any error message.

Posted in Citrix XenApp | Leave a comment

Implementing XenDesktop 7.1 with Write Cache and Personal vDisk using PVS 7.1

Prerequisites:

· Install XenDesktop 7.1 and configure with a Site.

· Install PVS 7.1 and configure with a farm.

· Install and configure vCenter 5.1 and configure with XenDesktop Studio.

· Create appropriate security group to make the members of local admins.

· Create a Windows 7 VM to be used as the Master image and optimize as per the recommendation.

· Create appropriate a Group Policy and link to the OU that will contain the computer accounts created by the XenDesktop Setup Wizard.

The Write Cache drive is always created as Drive D and the Personal vDisk is created with the drive letter assigned during the Wizard.

1. Add 2 hard drives of difference sizes to the VM. For example, Write Cache: 10GB and PvD: 20GB.

2. Login to the VM, in Disk Management initialize the 2 new drives with MBR partition type. The two drives will be shown as unallocated disks, do not format the disks.

3. Mount the PVS 7.1 ISO to the VM and install Target Device.

4. After installing Target Device disconnect the PVS ISO and launch Imaging Wizard.

5. Create a vDisk and optimize the device. So now the vDisk has been created in the PVS and a Target Device is created with the MAC address of the VM.

6. Shutdown the VM and configure to boot from the network first and the hard drive second.

7. When the VM is powered on, login with the same account to continue the Imaging Wizard.

8. Once it is completed the Imaging Wizard has now copied the contents of the VM’s C drive into the vDisk.

9. Now detach the C drive from the VM. So the VM has no C drive.

10. Go to PVS console, in the Target Device’s properties; change the Boot from order to vDisk.

11. Do power on the VM and you can see the 10GB Write Cache and 20GB PvD drives and the C drive (vDisk) in the Disk Management.

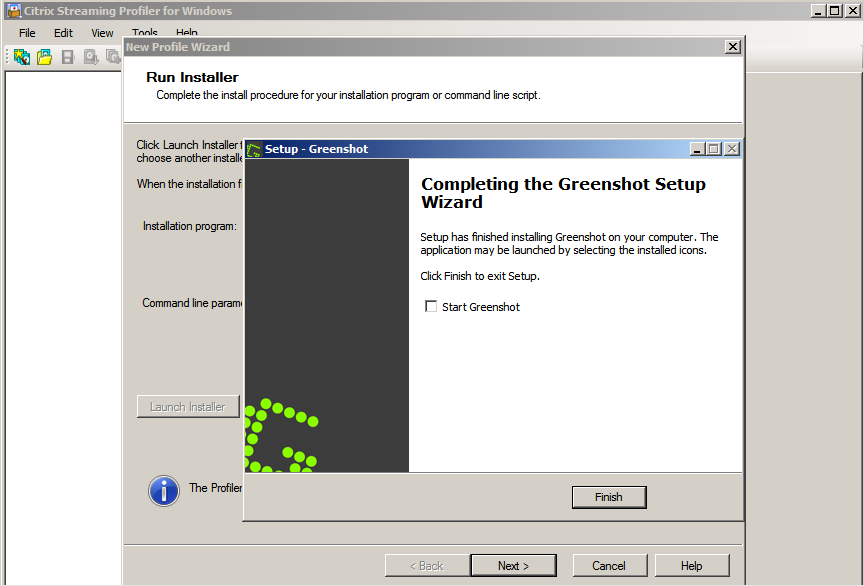
12. Now install XenDesktop 7.1 Virtual Delivery Agent (VDA) for PVS and shutdown the VM.

13. Detach the XenDesktop 7.1 ISO and login to the VM.

14. Install PvD update 7.1.1, i.e., Personal vDisk 7.1.1 and reboot the VM.

By default, PvD uses two drive letters: V and P. V is hidden and is a merged view of the C drive with the PvD drive. If drive V is already used, the drive letter can be changed.

15. Now run the PvD Inventory, Click Start, All Programs, Citrix, Update personal vDisk and then shut down the VM.

16. Make a copy of the VM for safer side and create a template from the VM.

17. In the PVS console, go to vDisk properties and change the Access mode to Standard image and Cache type to Cache on device hard drive.

18. Do right-click the Site and select XenDesktop setup wizard.

19. While setup select The same (static) desktop, and also select Save changes and store them on a separate personal vDisk and click Next.

20. Provide the number of VMs to be created by the setup and you can also see the Local write cache disk and PvD disk.

21. Once you complete the Wizard it will start creating VMs and target devices. You can see the target devices in the Device Collect in PVS Console and the VMs in the AD OU.

22. In the XenDesktop Citrix Studio, you can see the new Machine Catalog which has been created now.

23. Create a Delivery Group with appropriate Machine Catalog, User Groups and the StoreFront server.

24. Now you can edit the Delivery Group to make it online according to your requirement.

25. It is ready for the users to login. The users can customize their desktop and after the reboot the customizations persist.

Posted in Citrix XenApp | Leave a comment

Step by step procedure for deploying XenApp servers with Provisioning Services

Provisioning Services is used to have a consistency across all XenApp servers within the farm. PVS is recommended for deploying XenApp servers in large implementations. As we have a single vDisk for all servers, management and administration of the XenApp farm becomes much easier.

With PVS we should only deploy XenApp Session-Only member servers and not the first server in the farm or any farm servers that are also Zone Data Collectors.

Procedural steps in deploying XenApp servers with PVS:

1. Install XenApp “Master Image” server and join it to the XenApp farm with all the applications.

2. Install the PVS Target Device from the media and shutdown.

3. Launch PVS Service Console in the PVS server and create a new vDisk in the PVS store.

4. Create a new Device Collection in PVS for the Master Image server.

5. Create a target device in PVS for the XenApp Master Image server. Configure the target device to boot from Hard Disk in Maintenance mode and assign the blank vDisk created earlier to the XenApp Master Image target device.

6. In the hypervisor host, change the boot order of the XenApp Master Image VM to boot from the network adapter. Now boot the XenApp Master Image server. It should perform a PXE boot and retrieve bootstrap file from PVS. The server will proceed to boot into Windows as normal. Login and make sure the Virtual Disk status in the System Tray shows activity. This indicates that everything is fine. So now create and add a new disk that will serve as the local Write Cache.

7. Shut down the XenApp Master Image server.

8. Remove the local C drive and create a backup

9. Convert the backup into a VM template and stored in the hypervisor. The VM template should only have the Write Cache drive attached.

10. Power on the XenApp Master Image VM template, and launch the Citrix XenApp Server Role Manager to Prepare this server for imaging and provisioning.

11. Now we need to capture the XenApp Master Image to a PVS vDisk.

12. Install XenConvert in the XenApp Master Image server, launch XenConvert and select options This Machine and Provisioning Services vDisk.

13. Remove the Write Cache disk and select Autofit to automatically adjust the vDisk space.

14. After conversion process is finished, shut down the XenApp Master Image server.

15. Launch PVS Service console, change the vDisk access mode from Private to Standard and the cache type to Cache on device hard drive.

16. Launch the Streamed VM Setup wizard enter the hypervisor and the credentials.

17. Select the VM template created which we created earlier, PVS Collection where the XenApp VMs are to be created and the XenApp vDisk to assign to them.

18. Specify number of virtual machines to be created with hardware specification and provide the Active Directory OU, where the accounts will be created.

19. After finishing the build process, we can see new XenApp VMs in the hypervisor.

20. Now everything is completed. Power on the VM. We should assign a new IP address if we use static IP for the VM Template.

Posted in Citrix XenApp | Leave a comment