
If a virtual machine (session host) in AVD environment encounters issues, we can roll back to a previous state using Azure VM snapshots.
Steps to Take a Snapshot
- Go to Azure Portal → Navigate to Virtual Machines.
- Select the AVD (session host) you want to snapshot.
- Under Disks, choose the OS Disk.
- Click Create Snapshot → Fill in details like name and storage type.
- Click Review + Create → Create Snapshot.
Created an AVD as a Gold Image to test snapshot rollback. Now, create a folder named ‘Test-snapshot-C-drive” in the C drive of the Gold Image to check if the data gets deleted after rollback.

Select ->Disk
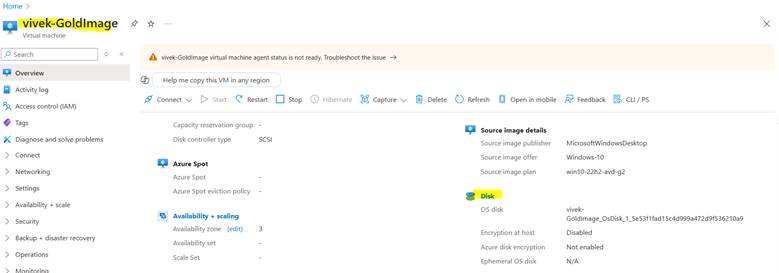
Now we can see the OS Disk details, please select again disk name to expand the details.

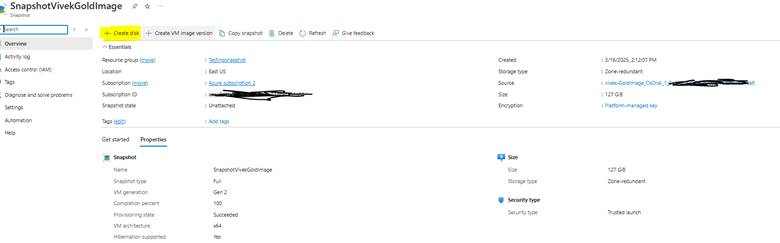
To take the snapshot, select the “Create Snapshot“

Fill the details of Snapshot.
| Snapshot Type | Best Use Case |
| Full (Default) | Best for full backups. Stores entire disk contents. |
| Incremental (Recommended) | Saves only changed data since last snapshot (cheaper and faster). |

Once snapshot created. Create the disk from snapshot.
Fill the details for disk.

Once disk created. Now, we can create the AVD from the disk.

By default, Image will be select as your disk
Deleted the Original AVD Gold Image after creating Disk and Validated the Test folder is available in C drive.
