
Step 1: Create a Base Virtual Machine:
• Go to Azure Portal → Virtual Machines → Click Create VM.
• Select a Windows OS for the Image (e.g., Windows 11, Windows 10 Multi-Session, or Windows Server from Azure Market place).
• Choose VM size (e.g., D-series for AVD workloads).
• Configure networking
• Click Review + Create and wait for deployment.
Important Note: We can use either Generation 1 or Generation 2 VMs; Gen 2 VMs support features that aren’t supported by Gen 1 machines.
Learn more about Generation 1 and Generation 2 VMs at Azure support for Generation 2 VMs – Azure Virtual Machines | Microsoft Learn
Step 2: Take the first snapshot of the VM
Once deployed the image, take a snapshot of the disk of the image VM.
Taking a Snapshot will not delete the VM. A snapshot is just a backup of the disk. The VM remains untouched. Capturing an Image will delete the VM in Azure, if it is generalized.
Step 3: Customize the VM
Sign in to the VM and start customizing it with apps, updates, and other things you’ll need for your image. If the VM needs to be domain-joined during customization, remove it from the domain before running sysprep.
Before taking the final snapshot:
• Install the latest Windows updates.
• Complete any necessary cleanup, such as cleaning up temporary files, defragmenting disks, and removing unnecessary user profiles.
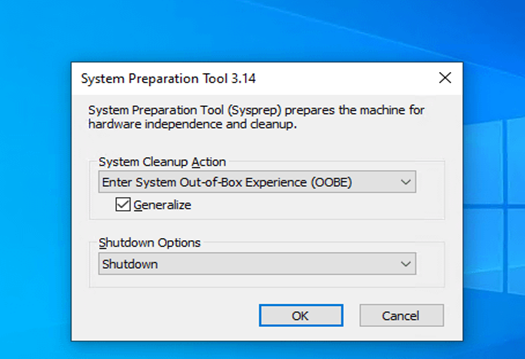
Location for Sysprep: C:\Windows\System32\Sysprep\Sysprep.exe
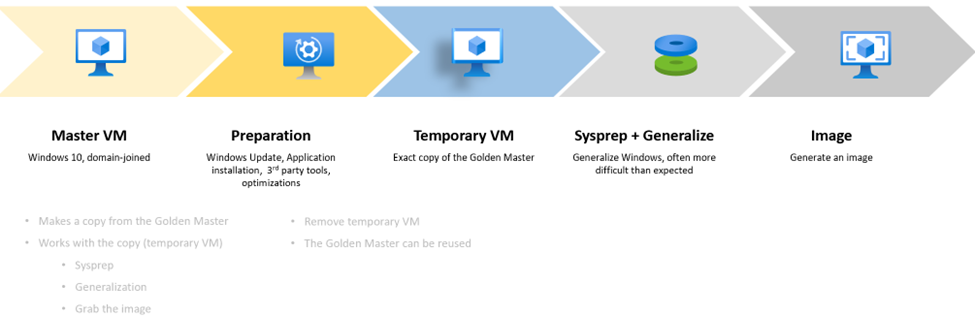
Sysprep: This will remove all your personal account and security information, and then prepares the machine to be used as an image.
Important Note: Disable the antivirus programs before running sysprep.
The process of generalizing a VM is not reversible. Sysprep requires the drives to be fully decrypted. So disable encryption before running Sysprep.
Step 4: Capture the VM
After completing the sysprep and shut down the machine in the Azure portal, open the VM tab and select the Capture button to save the image for later use. When we capture a VM, we can either add the image to a shared image gallery or capture it as a managed image.
Using Azure Portal:
1. Go to Virtual Machines → Select your VM.
2. Click Capture (under “Operations”).
3. Choose “No, generalize” since we already ran Sysprep.
4. Select a Compute Gallery or create a new image.
5. Click Review + Create.
If we need to store the image in “Azure Compute Gallery” then you need to create Target VM definition before capture the image of Gold VM.
Managed Image is best for small-scall VM Deployment and does not require image definition. Azure Compute Gallery Image is best for large scaling and multi-region AVD.
Steps to Create New Azure Compute Gallery:
Go to Azure Portal → https://portal.azure.com
Search for “Azure Compute Gallery” and click Create
Enter the following details:
Subscription: Choose your subscription
Resource Group: Select or create a new one
Gallery Name: Example: MyImageGallery
Region: Choose where the gallery will be stored
Sharing Method:
Private (Default) – For your subscription
Community – Share publicly
Direct Subscription – Share with specific subscriptions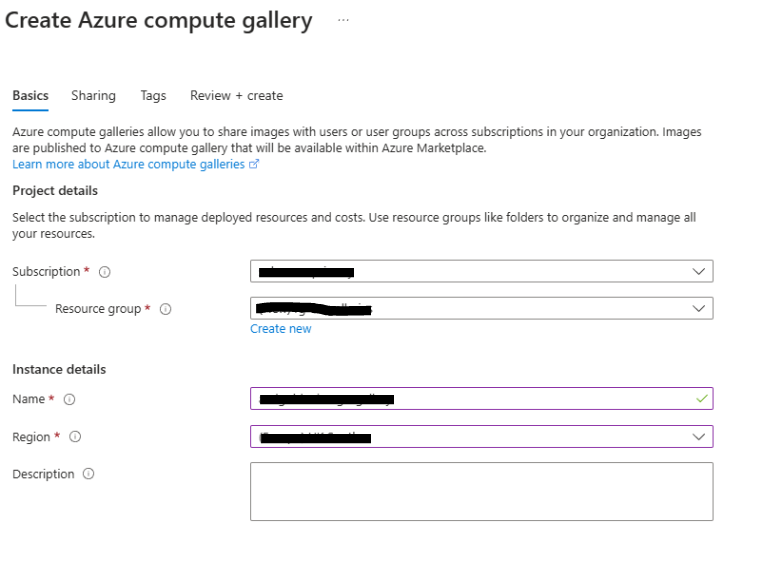
Click Review + Create → Create
Steps to Create New Image Definition:
An image definition acts as a template for all image versions inside an Azure Compute Gallery. It defines the OS type, offer, and SKU for your images.
Go to Azure Portal → https://portal.azure.com
Search for “Azure Compute Gallery” → Select your Gallery
Click + Create Image Definition
Enter the following details:
Subscription: Select your subscription
Resource Group: Choose an existing one or create a new one
Gallery Name: Select your existing Azure Compute Gallery
Image Definition Name: Example: Win10MultiSession
Operating System: Choose Windows or Linux
VM Generation:
Gen 1 – Legacy VMs
Gen 2 – Supports larger VM sizes, Secure Boot, TPM
Publisher
Offer: Example: Windows10Enterprise
SKU: Example: Win10-MultiSession
OS State:
Generalized – For reusable images
Specialized – For pre-configured, user-specific images
Click Next → Review + Create → Create
