
Citrix Automated Configuration Tool is used to migrate the on-premise Citrix configuration to Citrix DaaS environment. The Citrix Automated Configuration Tool can also migrate information between public cloud regions or tenants. It is used to automate the migration of CVAD configuration like policies, applications, catalogs, admin roles, scopes and others from one or more on-premises sites to Citrix DaaS hosted on Citrix Cloud.
Steps to export the configuration from on-premises Citrix environment
- Install ACT on the 1912 LTSR DDC.
- Connect to on-premise DDC.
- Download the latest version of the Citrix Automated Configuration tool.
- Install AutoConfiq_Powershell_x64.msi.
- Confirm that ‘Auto Config’ icon has been created for the ACT on the desktop.
- Export the Configuration from the on-premise DDC.
- Connect to the on-premise DDC and open the Auto config icon from the desktop.
- Run Export-CvadAcToFile
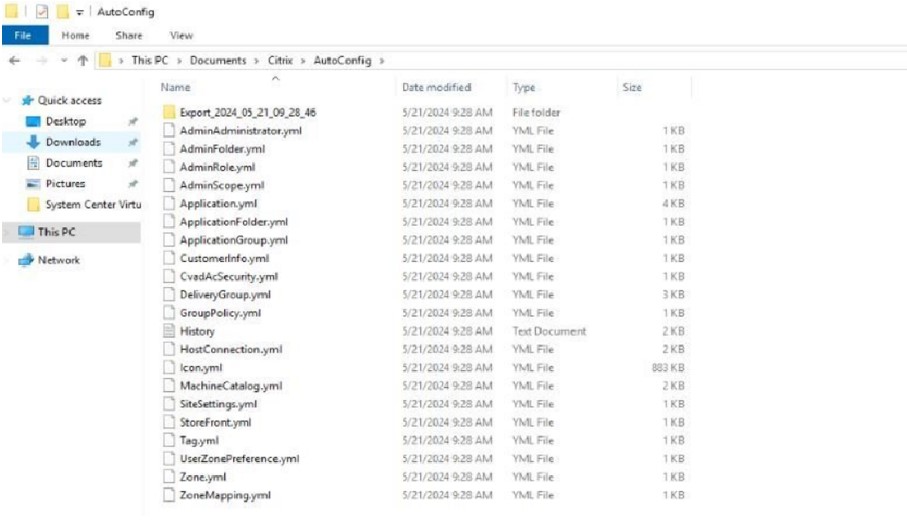
- It exports the on-premises configurations to YAML files (Customerinfo.yml, ZoneMappinging.yml, CvadAcSecurity.yml)
- Exported YAML files are placed in the directory c:\users\myusername\Documents\citrix\AutoConfig.
- An HTML file called ‘ Automated configuration Tool Log’ will provide details of the export process, including a summary of the components exported to YAML files.
- The Fixups section of the log file shows details if an import or merge fails.
Note:
All exported files are placed in two folder locations, providing ease of use and a history of exports. Exports are always placed in the root folder. Copies are placed in a subfolder named ‘Export’ with the date and time of the export. The root folder always contains the most recent exported on-premises site configuration. Each ‘Export’ subfolder includes the export done on the indicated date and time, which maintains a history of exports.
Steps to import the configuration to Citrix Cloud
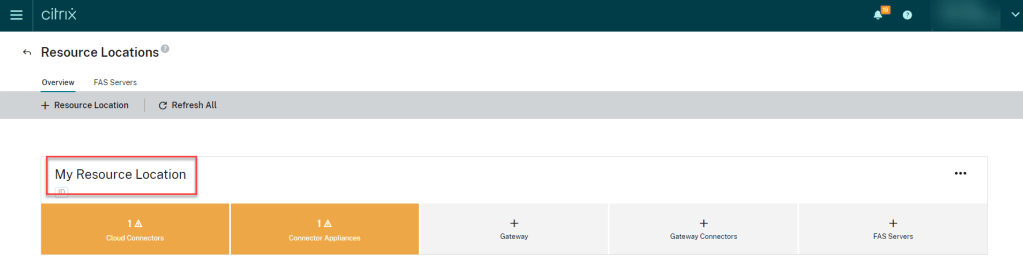
Make sure the prerequisites are ready in Citrix Cloud.
In the Resource Location the Cloud Connectors should be in green and we should have Customer ID, Client ID, and Secret Key
To get the Customer ID, sign into your Citrix Cloud account and select the customer.
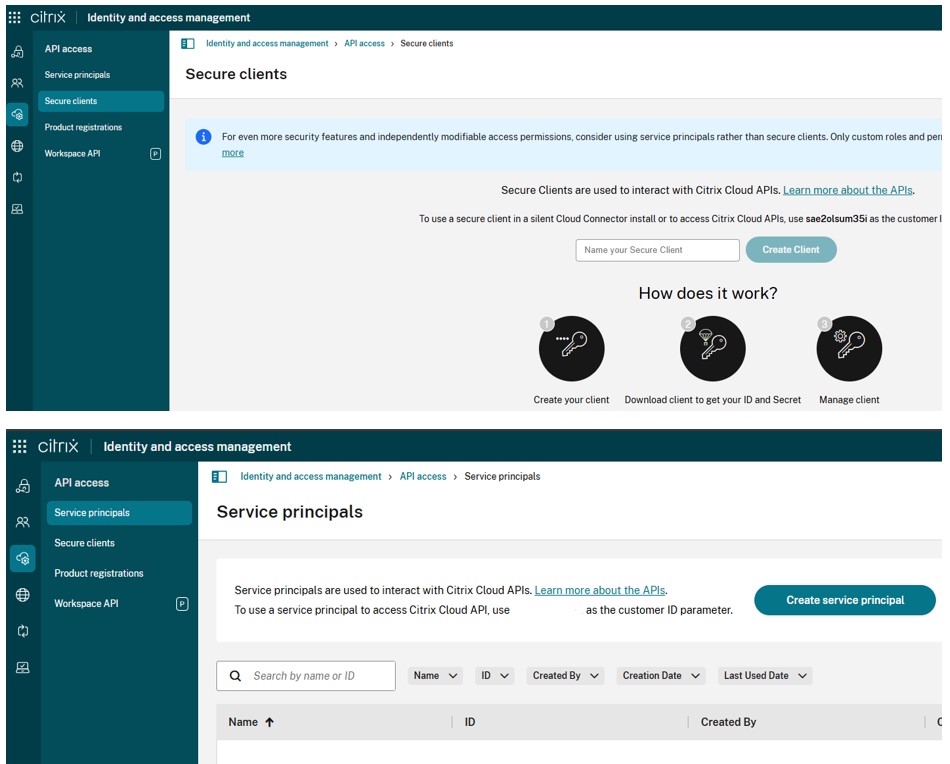
To get the Client ID and Secret Key, go to select Identity and Access Management, click the API Access tab.
Create the client ID and the secret key and save the detail separately. We can also download the information.
Copy the YAML files to the same location c:\users\myusername\Documents\citrix\AutoConfig in the Cloud Connector machine to import settings to the Citrix Cloud.
First, open CustomerInfo.yml file and update Customer ID, Client ID and Secret ID.
Then open ZoneMapping.yml. If we have only one default Zone, name Primary then we no need to update this file in the source location. Else update the Zones information.
In the destination ZoneMapping.yml file, the Name_Of_Your_Resource_Zone value must be replaced with Cloud Resource Location name.
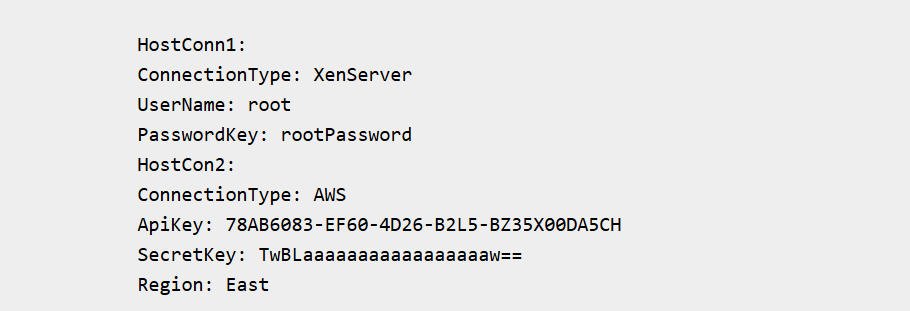
Then update the CvadAcSecurity.yml file. Host Connections and their associated hypervisors can be migrated to Citrix DaaS. Adding the Host Connections requires security information for the specific hypervisor. Update the username and password for the hypervisor connection.
After updating the YAML files, open Migration tool PowerShell console. Merge the existing Cloud configuration (if any exists) with the configuration exported from the On-Premises site with the command Merge-CvadAcToSite.
We can also run the command Import-CvadAcToSite -Applications $true, as it also merges the configuration by default. We can see the output as green after successfully running each task and YAML files are imported, and the corresponding components are added to the Citrix Cloud site.
